Connecticut home tips

crawlspaces explained🔍 What Homeowners Should Understand About the Crawlspace Beneath Their Home
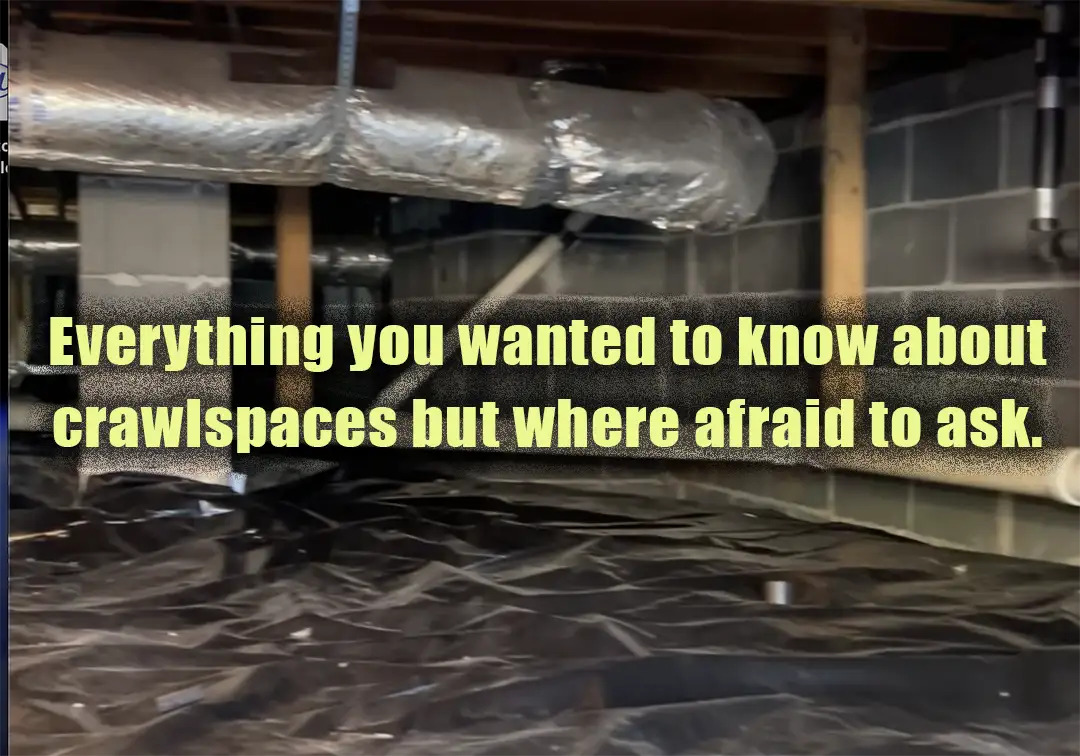
Out of sight, out of mind—that’s how many homeowners treat the crawlspace. But this hidden area plays a major role in your home’s overall health, safety, and energy performance. Overlooking it can result in expensive repairs and ongoing issues you didn’t see coming.

🏠 Defining the Crawlspace
A crawlspace is a shallow area located between the ground and the first floor of your home, typically around three feet high. It serves as an access point for essential systems such as plumbing lines, HVAC ductwork, insulation, and electrical wiring. Though often ignored, the condition of your crawlspace can significantly impact both the structure and air quality of your home. Read more

Connecticut home tips

powertool safety

A Killingworth True Value Tip

Just because power tools are widely available doesn’t mean they’re inherently safe. Many users dive right into their projects without reading safety manuals or understanding the potential hazards. But skipping these steps can lead to serious—sometimes permanent—injuries. From lost fingers to damaged eyesight, the consequences of improper tool use are very real. This overview introduces foundational safety tips for hand and power tool use, so you can approach every task with caution and confidence.

Fundamental Safety Tips for Power Tools
Each power tool is engineered for a specific task and may vary significantly depending on the manufacturer. That’s why your first line of defense is to carefully review the user manual and any included safety warnings before you begin. Understand how the tool operates, what its safety features are, and which actions or conditions to avoid. Aside from reading the instructions, always keep the following general practices in mind: Read more

Connecticut home tips

grout repair

A Killingworth True Value Tip

Crumbling grout can detract from the look of your tiled surfaces and compromise structural integrity. This common issue is often the result of improper mixing or application. Fortunately, it can be effectively corrected with the right approach. Follow these expert-recommended steps to restore and protect your grout lines:

1. Carefully Remove Damaged Grout

Begin by eliminating any loose or crumbling sections using a grout removal tool, such as a grout saw or utility knife. Work gently to avoid scratching the surrounding tiles. If the grout beneath remains solid, limit your removal depth to approximately 1/16 of an inch. Use a vacuum designed for fine particles to clean the debris. If mold or mildew is present, sanitize the area with a bleach solution and allow it to dry completely before proceeding.

2. Prepare the New Grout

Choose a grout product suited to your specific tile and application—whether sanded or unsanded. Always follow the manufacturer’s instructions closely, referring to online resources or tutorial videos when available. Mix only small batches you can apply within 15 minutes to prevent waste and ensure optimal consistency. Larger repairs may require multiple mixes.

3. Reapply the Grout

When applying the new grout, use a rubber grout float or, for tighter spaces, your finger to firmly press the material into the joints. Proper technique and angle matter—especially for vertical surfaces or detailed work—so take time to review recommended methods based on your tile type and location. Read more

Connecticut home tips

A Killingworth True Value Tip

As you tackle your spring cleaning checklist, there’s one hidden area of your home that deserves attention—your crawlspace. This often-forgotten space plays a vital role in air quality, moisture control, and even energy efficiency. Ignoring it can lead to issues like mold growth, pest infestations, and structural problems. Follow these steps to ensure your crawlspace is in top shape this season!

spring cleaning crawlspace home tips network

Step 1: Prioritize Safety

Before venturing into your crawlspace, gear up with gloves, a dust mask, and knee pads. Use a flashlight to navigate and stay alert for pests, exposed wires, or sharp objects.

Step 2: Remove Debris

Clear out any fallen insulation, trash, or organic matter such as leaves and twigs. This helps minimize moisture buildup and deters pests from taking up residence.

Step 3: Check for Moisture Problems

Examine the area for damp insulation, condensation, or standing water. If moisture issues are present, professional encapsulation offers better long-term protection than just a vapor barrier. Surprisingly, many new homes are built without any moisture barrier at all.

Step 4: Look for Pest Activity

Scan for rodent droppings, chewed wiring, or insect nests. If you spot any warning signs, consult a pest control expert before the problem escalates. Read more

Connecticut home tips

A Killingworth True Value Tip
By now, you’re familiar with the importance of maintaining balanced humidity levels, as well as the role of hygrometers, dehumidifiers, and humidifiers. However, simply running a dehumidifier may not always be enough to resolve persistent humidity issues. Here are some common concerns and practical solutions.

get rid of condensation inside your house
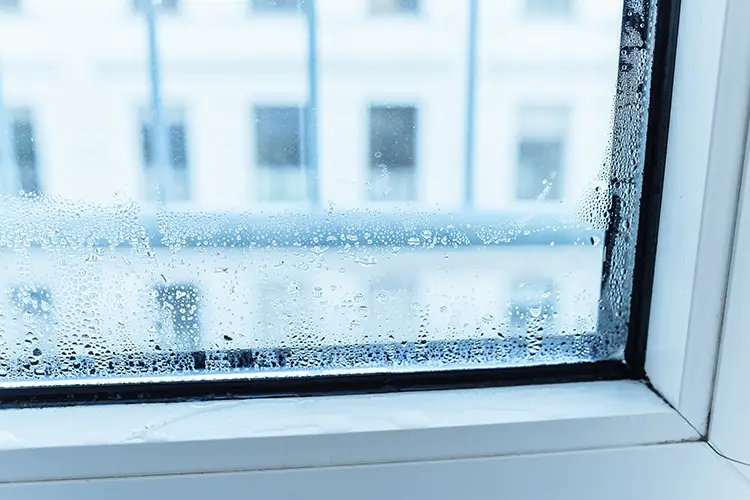
What Causes Excess Humidity in a Home?

Reducing indoor humidity effectively depends on various factors, including outdoor weather conditions. While dehumidifiers help, additional strategies can further control moisture levels:

Redirect Dryer Ventilation – Ensure clothes dryers vent directly outdoors.
Maximize Exhaust Fans – Use ventilation fans in kitchens and bathrooms to remove excess moisture. Read more

Connecticut Home Tips Blog

Hepa Filter

A Killingworth True Value Tip
A high-quality furnace filter is essential for maintaining indoor air quality and ensuring your HVAC system runs efficiently. With various options available, selecting the right filter can make a significant difference in air cleanliness and system performance.

When to Change Your Furnace Filter

Furnace filters trap dust, pollen, and other airborne contaminants, improving air quality and reducing respiratory risks. They also protect your HVAC system from debris buildup, enhancing efficiency and preventing costly repairs.

Most filters require replacement every 90 days, but homes with pets or allergy sufferers may need more frequent changes—every 40 to 60 days. Signs that it’s time for a replacement include:

  • Increased dust accumulation
  • Dark streaks around vents
  • Longer furnace cycles
  • Musty odors
  • Persistent allergy symptoms

Types of Furnace Filters

Fiberglass Filters

  • Budget-friendly but less effective at trapping small particles
  • Ideal for basic filtration needs

Pleated Filters

  • Made from synthetic fiber for enhanced filtration
  • Capture particles as small as 0.3 microns
  • Popular for their balance of affordability and efficiency

Electrostatic Filters

  • Use static electricity to attract dust
  • Washable and reusable, reducing waste
  • Best for small particles, but less effective on larger debris

Read more

Connecticut Home Tips Blog

Simple Tips for a Cleaner Living Space

vacuum with hepa filter

A Killingworth True Value Tip
Dust is more than just an eyesore—it can trigger allergies, worsen air quality, and make your home feel less fresh. Keeping dust at bay requires consistent effort, but with the right strategies, you can maintain a cleaner, healthier living environment. Here are some effective ways to keep your home dust-free:

  1. Use Doormats and Remove Shoes
    A significant amount of dust enters your home from outside. Placing doormats at entrances and enforcing a no-shoes policy indoors can help minimize the amount of dirt and dust brought in.
  2. Clean Regularly with a Damp Cloth
    Dry dusting only moves dust around rather than removing it. Use a damp microfiber cloth to wipe down surfaces, as it effectively traps dust instead of dispersing it into the air.
  3. Vacuum with a HEPA Filter
    Regular vacuuming—especially in high-traffic areas—is essential. Use a vacuum with a HEPA filter to capture tiny dust particles and allergens rather than releasing them back into the air.
  4. Wash Bedding and Upholstery Frequently
    Fabric surfaces like bedding, curtains, and upholstered furniture attract dust and allergens. Wash your sheets, pillowcases, and blankets weekly, and vacuum your furniture and drapes regularly.
  5. Declutter to Minimize Dust Collection
    The more items you have, the more surfaces there are for dust to settle on. Keep your home organized and minimize unnecessary clutter to reduce dust buildup.
  6. Change HVAC Filters Regularly
    Your home’s air filters trap dust and debris. Change them every one to three months to maintain good air quality and prevent dust from recirculating.
  7. Use an Air Purifier
    An air purifier with a HEPA filter can help remove airborne dust and allergens, making your indoor air cleaner and fresher.

Read more

Connecticut home tips

A Killingworth True Value Tip

Essential Items to Keep in Your Car Emergency Kit

Having an emergency kit in your car can be a lifesaver in unexpected situations. Whether you experience a breakdown, bad weather, or an accident, being prepared ensures your safety and comfort. Here’s a list of essential items to keep in your vehicle’s emergency kit:

car emergency kit

1. Basic Survival Essentials

  • Water – Keep bottled water or a few pouches of emergency drinking water.
  • Non-perishable snacks – Energy bars, nuts, or dried fruit provide necessary sustenance.
  • Blanket or sleeping bag – Helps retain body heat in cold weather.
  • Extra clothing – Warm gloves, socks, and a hat are useful in winter.

2. First Aid and Personal Safety

  • First aid kit – Include bandages, antiseptic wipes, pain relievers, and necessary medications.
  • Flashlight & extra batteries – Essential for visibility at night.
  • Multi-tool or knife – Useful for cutting seat belts, fixing minor issues, or self-defense.
  • Whistle – Helps signal for help if stranded.

3. Roadside Emergency Tools

  • Jumper cables – A dead battery is one of the most common car issues.
  • Tire repair kit & air pump – A quick fix for a flat tire.
  • Jack and lug wrench – Necessary for changing a flat tire.
  • Duct tape & zip ties – Handy for temporary fixes.
  • Tow strap – Can be used to pull your car out of a ditch or snowbank.

Read more

Connecticut Home Tips Blog

A Killingworth True Value Tip

Power tools are invaluable for DIY projects and professional work, but they also pose significant safety risks if not used properly. Whether you’re a seasoned contractor or a weekend warrior, following these power tool safety tips can help prevent accidents and injuries.

power tools safety tips

1. Wear Proper Protective Gear

Always wear the appropriate personal protective equipment (PPE) when using power tools. This includes:

  • Safety glasses or goggles to protect your eyes from flying debris.
  • Hearing protection if using loud tools like saws or drills for extended periods.
  • Gloves to maintain a good grip, but avoid loose-fitting ones that can get caught in moving parts.
  • A dust mask or respirator when working with wood, drywall, or materials that produce airborne particles.

2. Inspect Tools Before Use

Before starting any project, inspect your power tools for damage, wear, or frayed cords. Do not use tools with broken parts, and always ensure that all guards and safety mechanisms are in place and functioning properly.

3. Use the Right Tool for the Job

Never force a tool to perform a task it wasn’t designed for. Using the wrong tool can lead to inefficient work and increase the risk of accidents.

4. Keep Your Work Area Clean and Organized

A cluttered workspace can be hazardous. Ensure that floors are free from tripping hazards, tools are properly stored when not in use, and extension cords are neatly arranged to prevent entanglement.

5. Handle Power Cords with Care

Avoid running power cords across high-traffic areas, and never yank cords to disconnect tools from outlets. Keep cords away from sharp objects, heat, and water to prevent electrical hazards. Read more

Connecticut Home Tips Blog

A Killingworth True Value Tip
As temperatures drop, energy bills often rise due to increased heating demands. Fortunately, there are simple yet effective ways to keep your home warm while saving energy and money. Here are some essential winter energy-saving tips:


Winter Energy Savings Tips from Connecticut Home Tips

1. Seal Drafts and Insulate

Cold air can seep through gaps around doors, windows, and attics. Use weatherstripping, caulk, or draft stoppers to seal leaks. Adding insulation to attics, basements, and walls helps retain heat and reduces energy consumption.

2. Use a Programmable Thermostat

A programmable or smart thermostat can adjust temperatures automatically, reducing heating when you’re asleep or away. Setting it to 68°F when you’re home and lowering it when you’re not can lead to significant savings.

3. Let the Sun In

Take advantage of natural sunlight during the day by opening curtains and blinds on south-facing windows. This free heat source can help warm your home naturally. At night, close them to trap warmth inside.

4. Maintain Your Heating System

Regular maintenance of your furnace or heat pump ensures it runs efficiently. Change filters monthly and have a professional tune-up annually to keep your system in top condition.

5. Use Ceiling Fans Wisely

Ceiling fans aren’t just for summer! Running them in reverse (clockwise) at a low speed helps push warm air downward, keeping your rooms warmer without cranking up the heat. Read more